Move Your Existing Server to MCHosts
Already running a Minecraft server somewhere else? You can bring your world, players, and progress across to MCHosts without losing anything. Our Import Server tool does the heavy lifting for you, and this guide walks you through the whole move.
The short version
- Download your world (or your whole server) from your current host as a zip
- Open the File Manager in your MCHosts control panel and click Import Server
- Follow the steps in the import tool
- Start the server and join
Each step is covered in detail below.
One note before you start: we will never ask for your old host's password or login details, and you should never share them with anyone. Every step of the move happens on your side, in your own accounts.
Step 1 - Download your files from your old host
Every host has a slightly different way of getting your files out. We have written a guide for each of the big ones:
- Download your server from Apex Hosting
- Download your server from Shockbyte
- Download your server from BisectHosting
- Download your world from Aternos
- Download your world from Minehut
- Download your server from PebbleHost
- Download your server from Stipe
With a different host? The same ideas apply: find the file manager or SFTP details in their panel and download your files.
What to grab:
- The whole server as one zip is best if you can get it. Your plugins or mods, settings, and world all come across together, and the import tool keeps your exact setup
- Just the world works too. That means the folder called
world, plusworld_netherandworld_the_endif they exist (Paper and Spigot servers keep the Nether and End in those extra folders)
If you are unsure, grab everything. Extra files do no harm.
Do not delete your old server yet. Keep it until your world is confirmed working on MCHosts.
Step 2 - Run the Import Server tool
- Open the File Manager tab in your MCHosts control panel
- Click Import Server in the toolbar
- Pick your zip file and follow the steps on screen
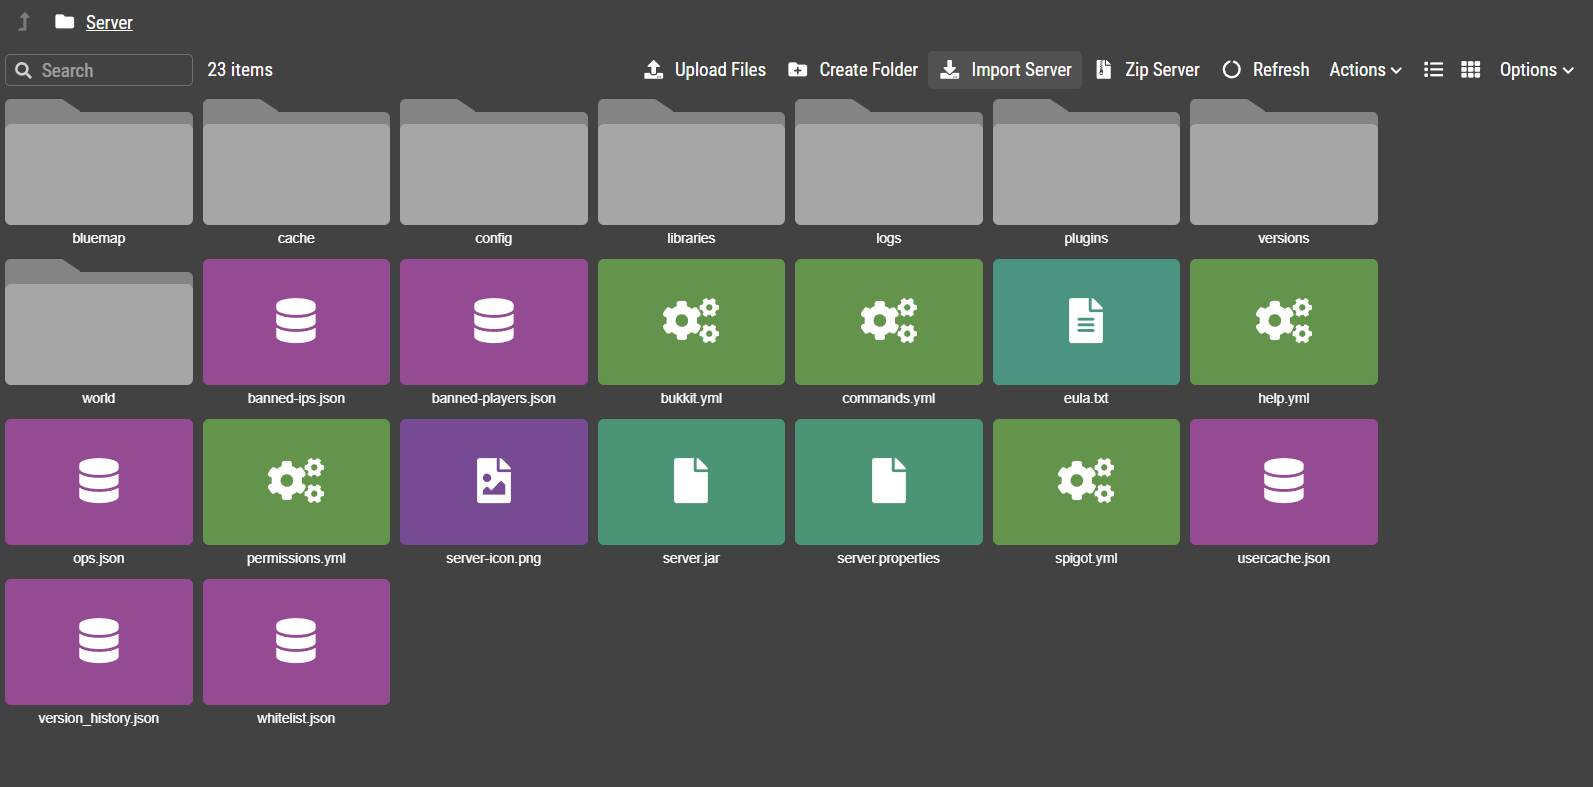
The tool reads your zip before touching anything and works out what is inside: the Minecraft version your world was saved on, and the server software it ran (Vanilla, PaperMC, Forge, NeoForge, or Fabric).
- If your world needs a different version or server type than your MCHosts server is running, the tool offers to switch it for you and explains what will happen before you confirm
- Your current world is backed up automatically before anything is replaced, so nothing is lost if you change your mind
- Large zips are fine. The tool uploads files well past the File Manager's normal 100 MB limit
A few things the tool will warn you about: Bedrock worlds (from a phone, console, or Windows Bedrock) use a different format and cannot be imported, though Bedrock players can still join your Java server through crossplay, see Bedrock Edition (GeyserMC). And if you import just a world from a modded server, your MCHosts server needs the same mods installed first, see Installing a Modpack. A full server zip brings its mods with it, so this only comes up for world-only zips.
Step 3 - Start and check
When the import finishes, press Start Server on the tool's final screen, wait for the server to come up, and join. Walk around your base, check a chest or two, and make sure the Nether and End work if you brought them.
If something looks wrong, your old world is still safe, both on your old host and in the backup the tool took before the import. If you cannot work out what went wrong, open a support ticket.
A note on Minecraft versions
Worlds are safest on the exact Minecraft version they were saved on, which is why the import tool offers to match it for you. A version mismatch in either direction still loads, but it can quietly cause damage: an older server deletes any blocks and items it does not know about, and a newer server permanently upgrades the world on first load, which cannot be undone. Either direction can also corrupt chunks or change how new terrain generates. When the tool prompts you about a version change, that is what it is protecting you from.
Prefer to do it by hand?
You can also move everything yourself without the import tool:
- Set your MCHosts server to the same version your world was saved on in Version Management. Do this before uploading, because changing version resets the server files
- Stop your server from the Dashboard. Uploads only work while the server is stopped
- In the File Manager, rename the existing
worldfolder to something likeworld_old - Upload your zip into the
Serverfolder, click it, and choose Unzip - Make sure the unzipped folder is named exactly
world, renaming it if needed, and do the same forworld_netherandworld_the_endif you have them - Delete the zip file to free up space, then start the server
Manual uploads through the File Manager are capped at 100 MB per file. Bigger world? Use SFTP Access instead, which has no size limit.
What about plugins, mods, and settings?
If you imported a full server zip, they are already across. If you brought just the world:
- Plugins: reinstall them from the Plugins & Mods tab, or upload your old
pluginsfolder to keep every plugin's settings and data - Settings: things like the MOTD, difficulty, and whitelist live in
server.propertiesand a few small files, see Server Properties - Player data: player inventories and positions are stored inside the world folder, so they come across automatically
Trying MCHosts risk-free
Every new server includes a 7 day money back guarantee, so you can move your world over, play on it, and get a full refund if it is not for you. Your old world stays safe on your computer either way.